Web Application - HTML Form
HTML Forms
To collect information from users — we do this by using the HTML form element.
User information is collected in an HTML form via a web browser, and then submitted to a web server for processing — here shows how controllers can be used to process form data.
A HTML form is a section of a document that may contain normal markup, as well as special elements called controls (checkboxes, radio buttons, drop-down lists, file selection, etc.), as well as labels for the controls.
Users "complete" a form by modifying its controls (entering text or making selections).
When a completed form is submitted, its data is first processed by a user agent, running as part of the browser, before it is actually submitted to a processing agent (e.g., a web server or a mail server) on the server side.
The basic structure of a form element is as follows:
<form action="http://www.example.com/log" method="get">
  <!-- form controls and other HTML markup -->
  <input type="submit" value="Log In">
</form>
- The
actionattribute is used to specify the URL of the processing agent on the server side that will receive the data collected in the form. - The
methodattribute is used to specify the HTTP request method that the user agent will use to send the data. HTML user agents must support: - GET – in which case the form data must be sent as part of the URL, i.e., the data is URL-encoded, and appended to the request URL.
- POST – in which case the form data must be included in the HTTP message request body.
Form Submission - GET Request
URL encoding works as follows — the form data is separated from the URI by a “?”, each name/value pair is separated by “&”, and each name is separated from its value by a “=” (“unsafe” characters, e.g., “/” and “&”, are escaped).
Example:
<form action="http://www.example.com" method="get">
<label>
  First name:<input type="text" name="firstname"><br>
</label>
<label>
  Last name:<input type="text" name="lastname"><br>
</label>
<input type="submit" value="Submit Form">
</form>
Above code produces the following in a browser:

This is what happens when the form is submitted:

The GET method should be used when a form is idempotent (i.e., it does not cause side effects). E.g., if the form data is used to search a database, there are no side effects.
You should not send sensitive data in a form using the GET method — the sensitive data will end up in the URL and anyone monitoring the network traffic can see it.
The GET method should not be used if there is a large amount of form data, or if the form data contains non-ASCII characters or binary data.
The GET method cannot be used if the form contains a file upload control — files cannot be passed in the URL.
Form Submission - POST Request
If the server-side processing associated with the form causes side effects, e.g., modification of a database, subscription to a service, etc., then the POST method should be used.
Furthermore, if the form data is sensitive, the HTTPS protocol should be established, so that the form data will be encrypted in the message body before it is sent to the server
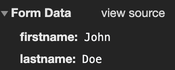
Example:<form action="http://www.example.com" method="post"> <label> First name:<input type="text" name="firstname"><br> </label> <label> Last name:<input type="text" name="lastname"><br> </label> <input type="submit" value="Submit Form"> </form>
The form now contains the Post Request Method:

And the parameters are now included in the message body:
Form Submission Process
The user agent running in the browser identifies the successful controls, and builds a form data set — a sequence of control-name/current-value pairs for the successful controls.
The form data set is encoded by the user agent according to the content type specified in the enctype attribute of the form element.
- –
application/x-www-form-urlencoded— this is the default, form data is encoded as name-value pairs. - –
multipart/form-data— form data is encoded as a message, with a separate part for each control. - –
text/plain— form data is encoded as plain text.
The user agent submits the encoded data set to the processing agent running on the server side using the HTTP protocol method specified by the action attribute in the form.
Form Controls
Users interact with forms through named form controls.
Form controls are specified using an input or select element that must appear in the content section of the form element, i.e., between the <form> and </form> tags.
The name of a control is specified using the name attribute.
A control has an initial value and a current value, both of which are character strings. The current value is first set to the initial value, but may change according to user supplied input.
Available form controls include: text, date, buttons, checkboxes, radio buttons, select boxes (drop-down lists), file select boxes, hidden controls, etc. (see www.w3schools.com for a full list).
Form Controls - Buttons
Button controls are specified using either the button element or the input element. The type attribute, which should always be specified (as different browsers have different defaults for the type), has three possible values:
submit– Causes the form to be submitted.reset– Causes the form to be reset, i.e. all controls are assigned their initial values.
button– Creates a push button, that typically has a client-side script associated with it through the event attribute. When the button is pressed and released, the associated script is executed.
With the input element, the type attribute may be specified as image. This creates a graphical submit button. The src attribute specifies the URL of the image file that will decorate the button.
Button controls have numerous attributes that support event-driven programming.
This programming style supports interactivity in browsers, i.e., you click a button (an event), the event is processed (typically by running a script) and something happens in the browser window.
Some of the events attributes that can be specified for a button include: onblur, onfocus, onclick, ondblclick, onmousedown, onmouseup, onmouseover, onkeypress,onkeydown, onkeyup, onreset.
For each of these attributes, the value supplied is the script that should run when the corresponding events occurs.
Form Controls - Checkboxes, Radio Buttons
Checkboxes and radio buttons are specified using the input element.
- These are essentially “on/off” switches that can be toggled by the user.
- Several of these controls can share the same control name.
- A switch is “on” when the control element’s checked attribute is set.
- When a form is submitted, only the “on” checkbox and radio button controls are treated as successful.
- If several radio button controls share the same name, they are treated as mutually exclusive. I.e., when one is switched “on” all of the others with the same name are switched “off.”
- Multiple checkboxes with the same name may simultaneously be switched “on” in a form.
Form Controls - Text Input and File Select
There are two types of text controls, both of them use the input element, and are specified using the type attribute:
text– creates a single line text input control.textarea– creates a multi-line text input control.
The file select control also uses the input element, and the type attribute has the value file. This control allows a user to select a file, whose contents will be submitted with the form.
The password input control uses the input element, and the type attribute has the value password. With this control, user input is shown in the browser as dots or asterisks.
Form Controls - Select Boxes
Drop-down select boxes are specified using the select element.
- Each choice offered by the menu is represented by an
optionelement, and eachselectelement must contain at least one option element. - The
optgroupelement allows several of the menu choices to be grouped together. These must appear directly within the select element, i.e., groups in general may not be nested.
<select name="selColor">
  <option selected="selected" value="">Select color</option>
  <option value="red">Red</option>
  <option value="green">Green</option>
  <option value="blue">Blue</option>
</select>
Latest Post
- Dependency injection
- Directives and Pipes
- Data binding
- HTTP Get vs. Post
- Node.js is everywhere
- MongoDB root user
- Combine JavaScript and CSS
- Inline Small JavaScript and CSS
- Minify JavaScript and CSS
- Defer Parsing of JavaScript
- Prefer Async Script Loading
- Components, Bootstrap and DOM
- What is HEAD in git?
- Show the changes in Git.
- What is AngularJS 2?
- Confidence Interval for a Population Mean
- Accuracy vs. Precision
- Sampling Distribution
- Working with the Normal Distribution
- Standardized score - Z score
- Percentile
- Evaluating the Normal Distribution
- What is Nodejs? Advantages and disadvantage?
- How do I debug Nodejs applications?
- Sync directory search using fs.readdirSync